
wiki:20_rdc_charger:15_hardware:23_wr-1
Table of Contents
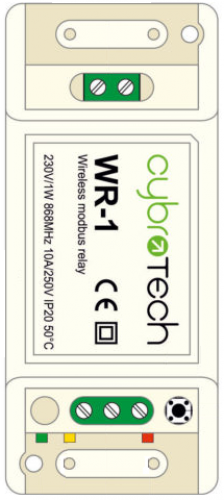
Wireless Modbus Relay
Wireless Modbus Relay
| Model number: | WR-1 |
|---|---|
| Frequency: | ISM 868MHz (EU) |
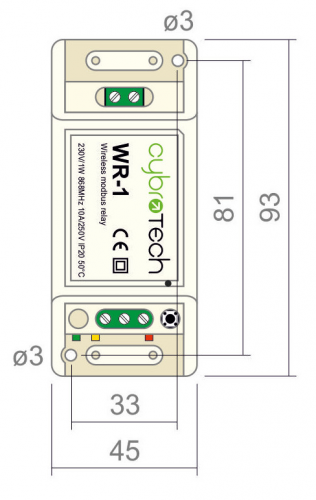
| Dimensions: | 93x45x27 mm |
Applications
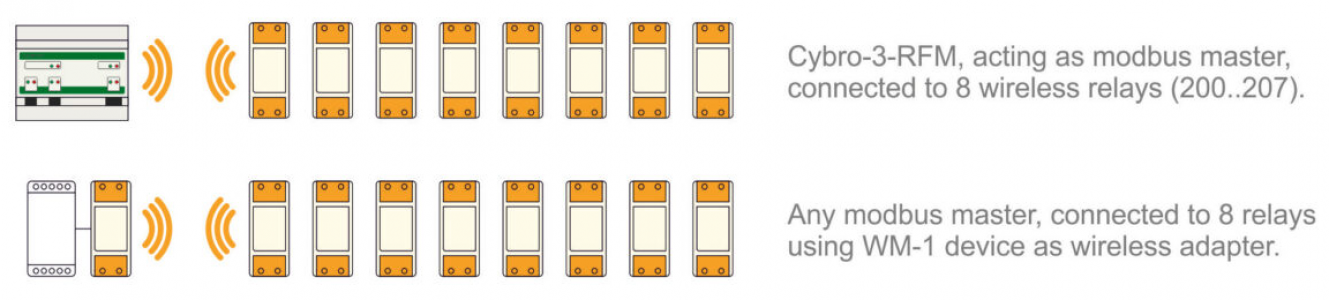
- Remote controlled relay. Act as modbus RTU slave. Optimal for long range, no hopping.
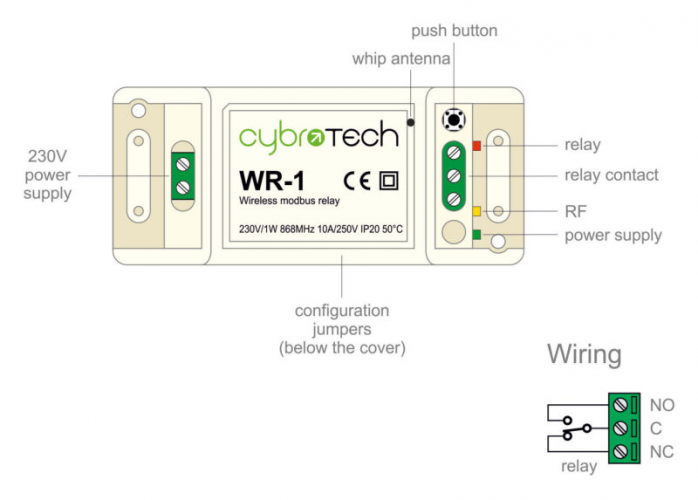
Installation and mounting
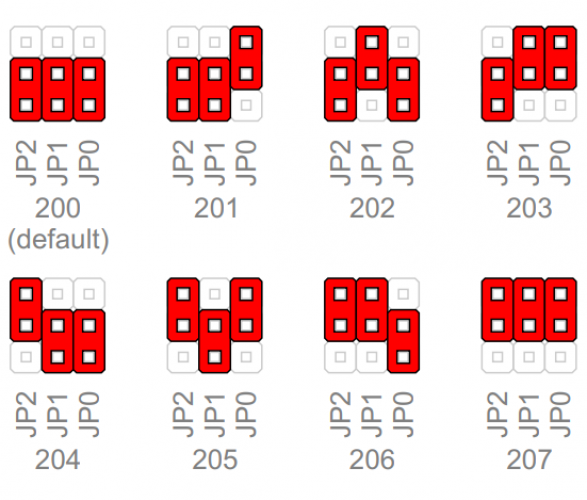
 Carefully open WR-1 module and configure address with jumpers. (Default address is 200)
- Place WR-1 module at least 10cm from other objects. Installation is not recommended inside metal cabinets.
- Connect relay terminals
- Connect to 230V power supply
- Configure radio pairing
Features
- remote controlled relay
- act as modbus RTU slave
- very long range, no hopping
- up to 8 relays per network
- protected private connection
- multiple addressable groups
Technical specification
| Power supply: | 230V, 50/60Hz, 1W |
| Ingress protection: | IP20 |
| Operating temperature: | -20..50°C |
| Storage temperature: | -40..85°C |
| Relative humidity: | 0..85% n/c |
Modbus
| Address range: | 200..207 |
| Relay mapping | coil 1(start address 00h) |
| Data bits & parity | 8n1 |
| Supported functions | 01 - read coil 05 - write single coil 15 - write multiple coils |
Relay output
| Nominal rating | 10A 250Vac (NO), 3A 250Vac (NC) |
| (resistive) | 5A 30Vdc (NO), 3A 30Vdc (NC) |
Radio
| Frequency band | ISM 868MHz (EU) |
| Subband | L 866.8MHz, 25mW, 1% utility |
| Modulation | fSK 38.4kbps 80kHz bandwidth |
| Listen before talk | yes, delay limited to 20ms |
| Group address | 32-bit, automatically generated |
| Connection time | 10s power-on to network ready |
| Message delay | 5ms from tx start to relay on |
| Output power | 25mW |
| Operating range | 3..300m with optical visibility |
Modbus address setting
Change is applied right away, no reset needed.
Radio pairing configuration
Create new secure group
* turn on all devices as the same time
* within 10 seconds, while RF LED is blinking, press and hold button on one of the devices
* after a second, the new address is randomly generated and sent to all devices. RF LED will blink 3 times to confirm the new address.
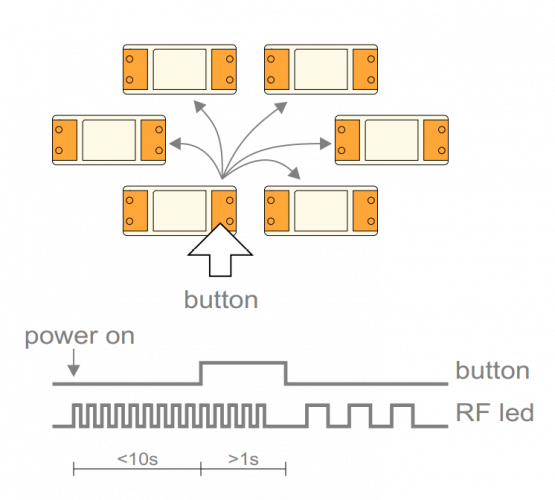
Add new device to the group
* turn on the device
* within 10 seconds, press and hold button on one of the existing devices
* after a second, the existing group address is sent to the new device. RF LED will blink 3 times to confirm the address is sent.

Examples
Connection check
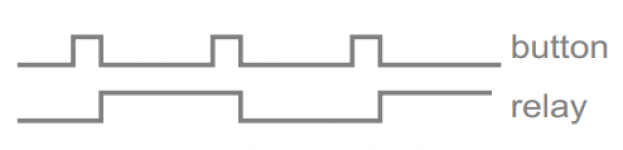
- press the button shortly
With each press of the button, the relay will switch on/off. Other devices are not affected.
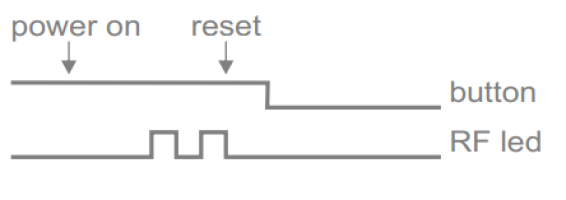
Factory reset
- Hold button and turn the device ON
- RF led will blink twice. Group address is now reset to default.
- Other devices will not be affected.
wiki/20_rdc_charger/15_hardware/23_wr-1.txt · Last modified: by 127.0.0.1